Installation
For Installation, follow this section step by step.
Pre packages
At first make sure you've already installed node v10 and yarn
We use the
firebase functionon this headless project and at this moment firebase function support node 10. For that, if you use node 10 then it'll make both deployment and development in the same environment.

If you don't have installed node or yarn, then go to these links to install that.
https://nodejs.org/en/ https://yarnpkg.com/
After that, install firebase-tools using this command to your terminal.
npm i -g firebase-tools
Then use this command to login firebase from console.
firebase login
It'll open a prompt to your browser for permission. After provide the permission the firebase will logged in from console
Firebase:
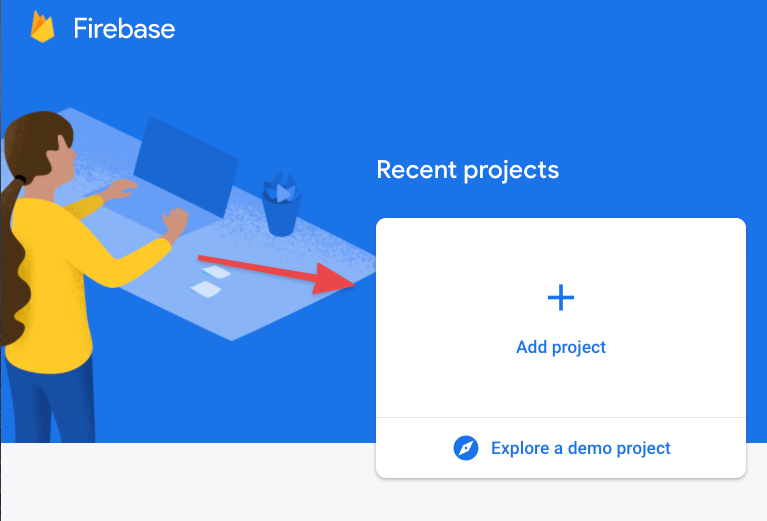
- Go to firebase console and create a new project
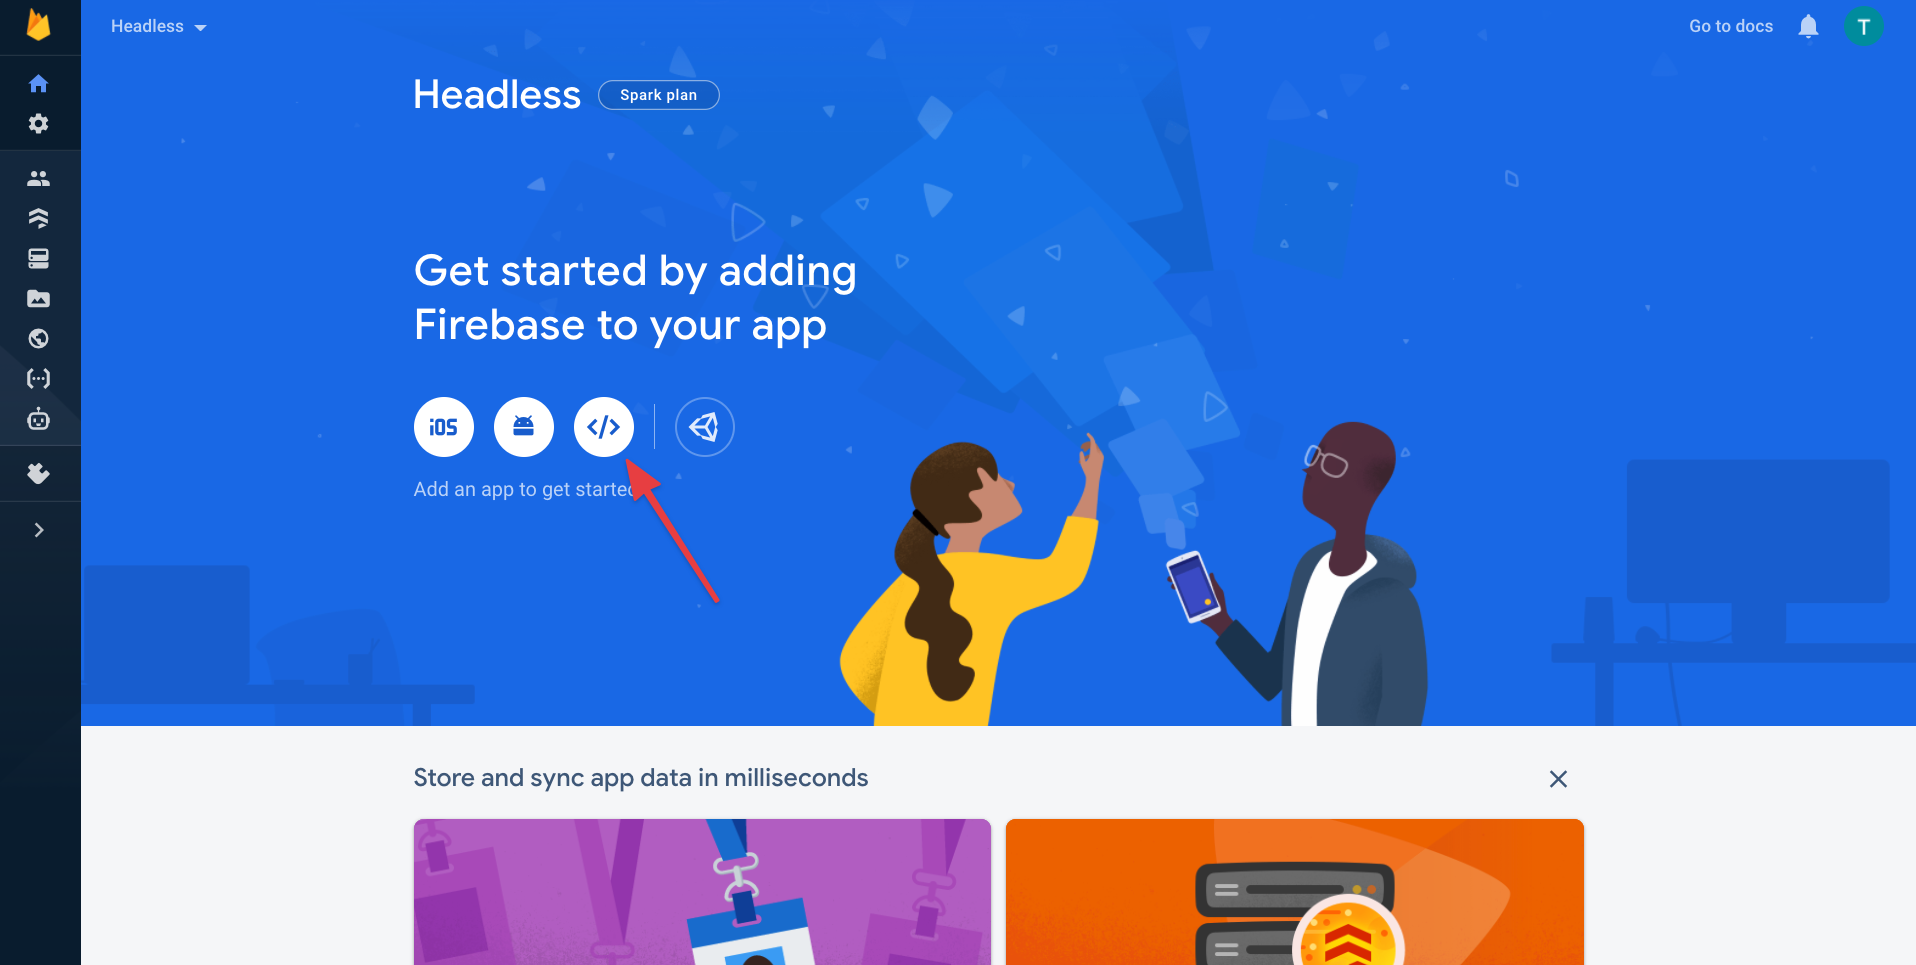
- Then register the app for
web.
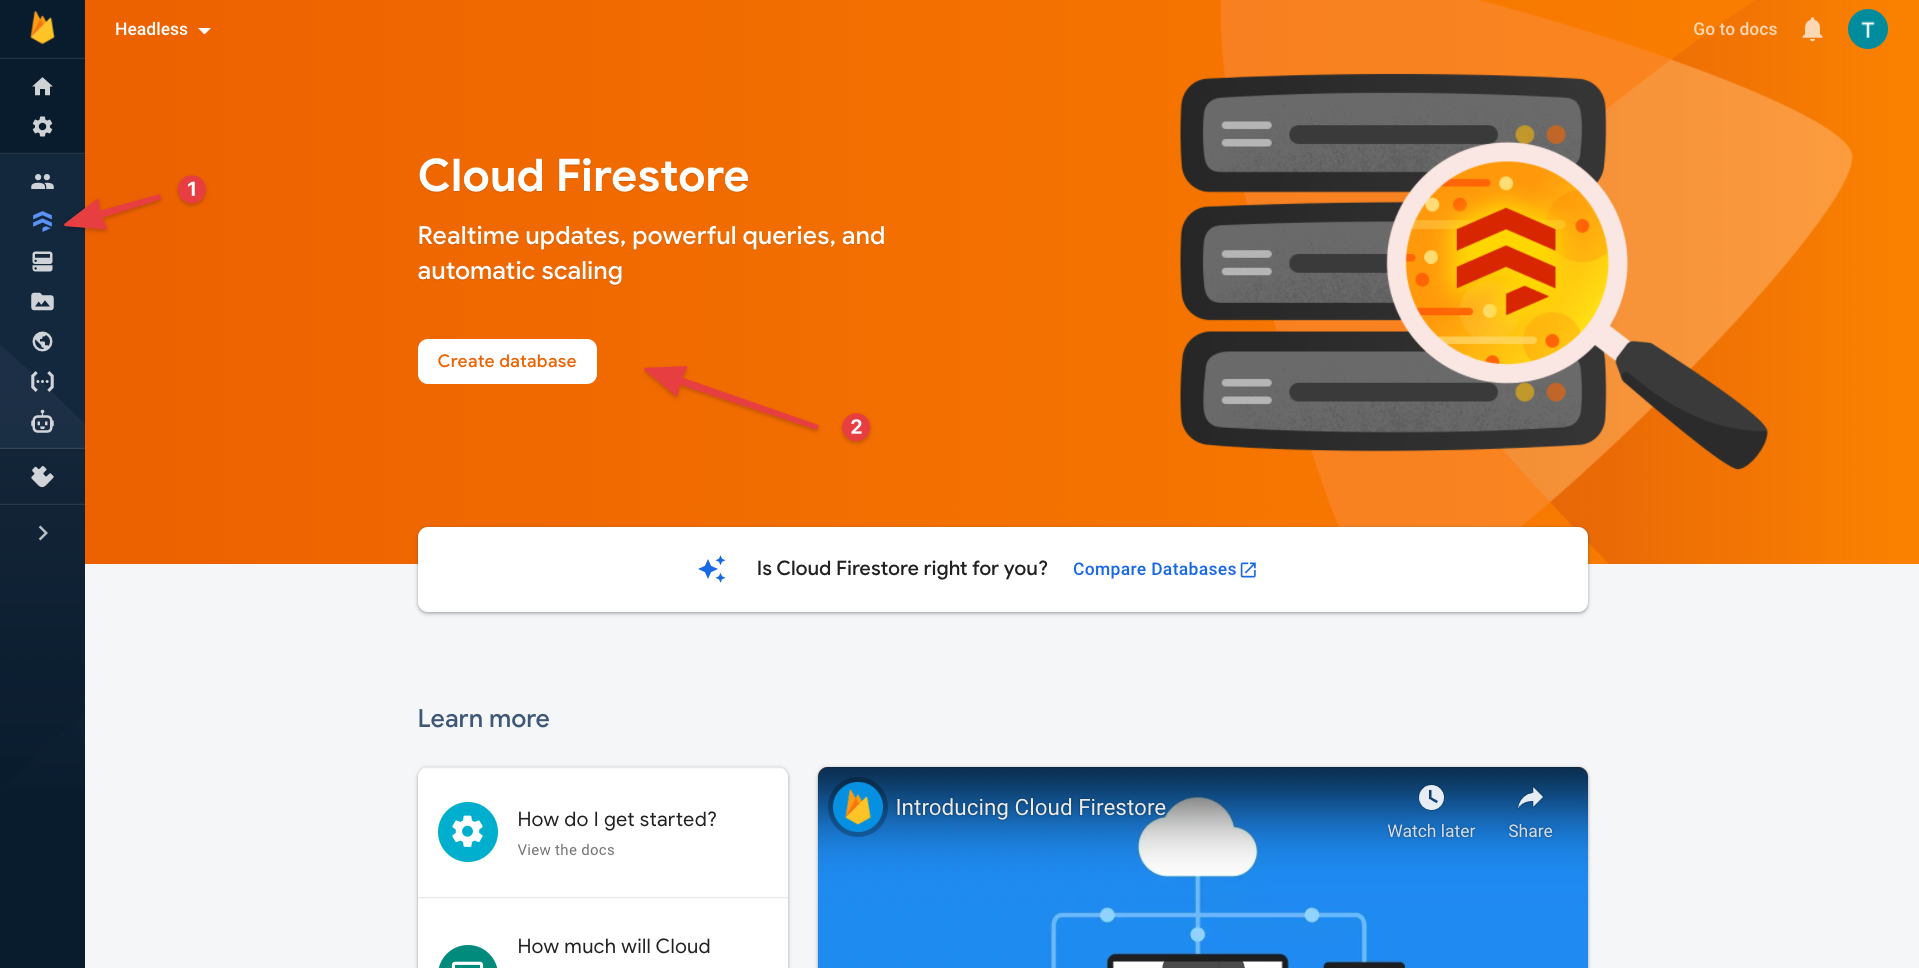
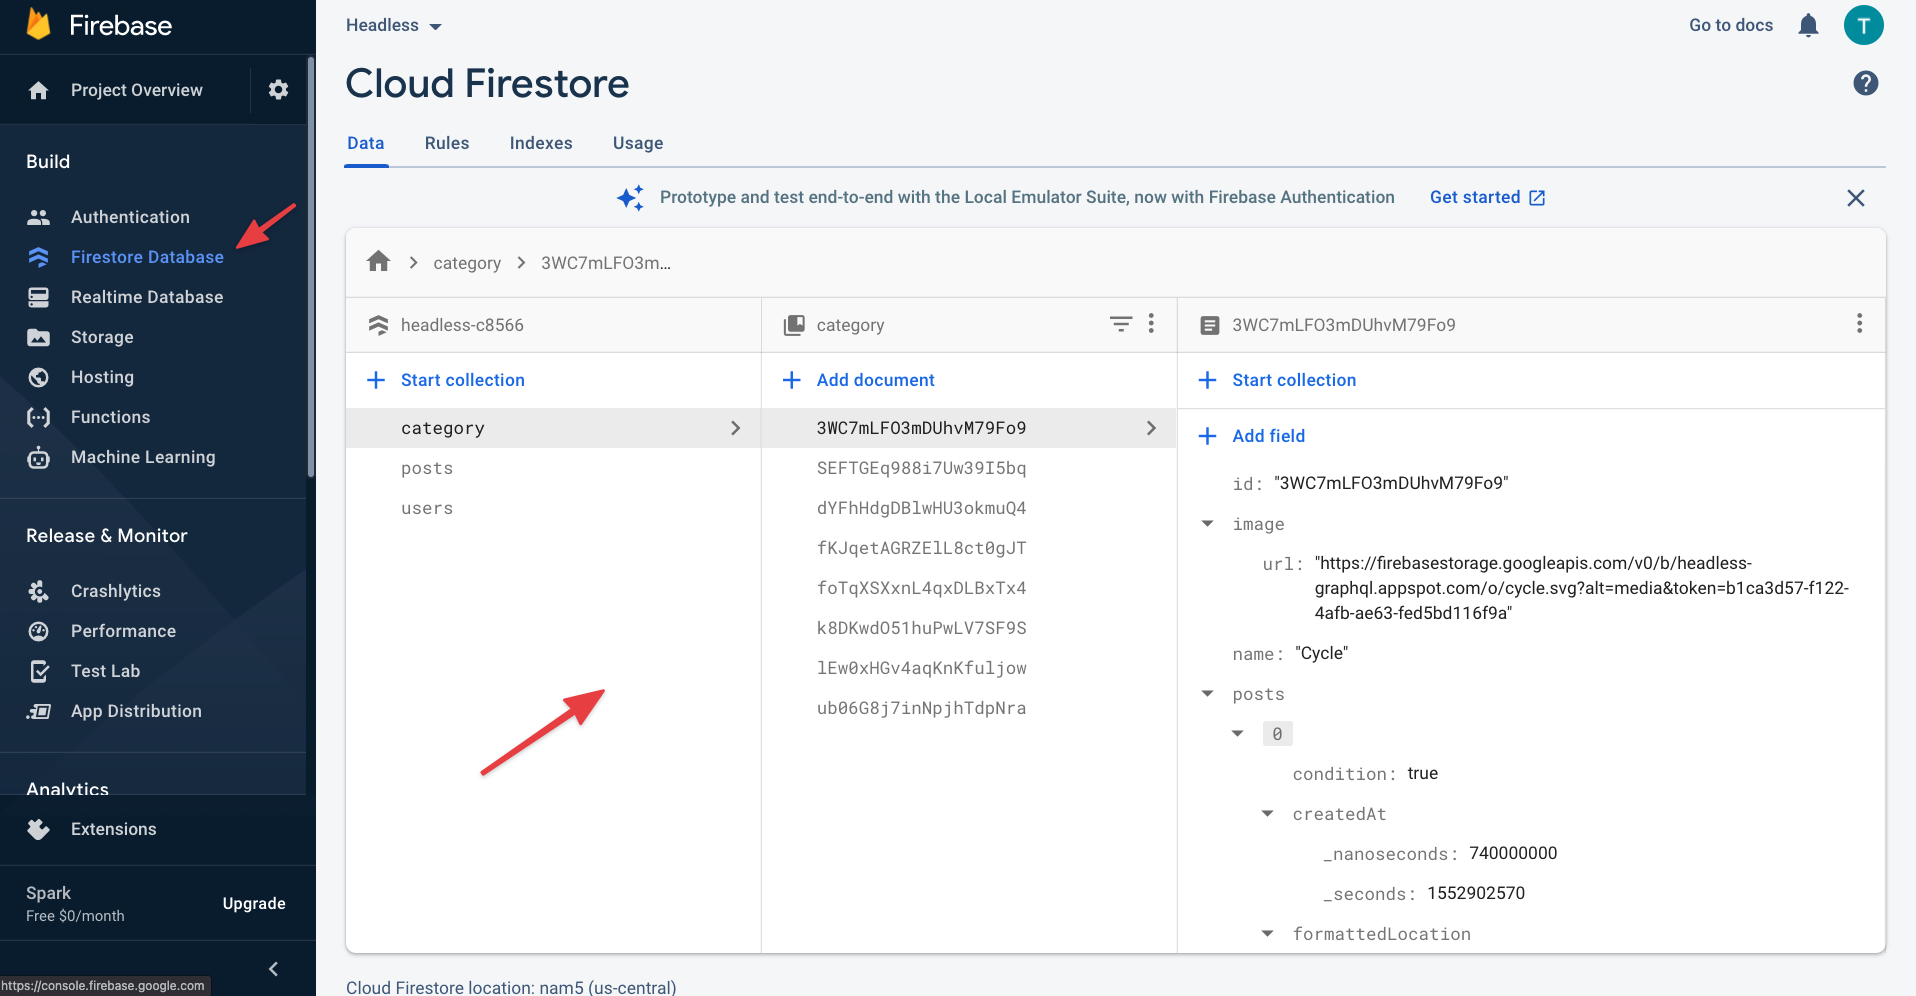
- After register the app, go to the
firestore databasesection and create a database
- Then go to the project settings,
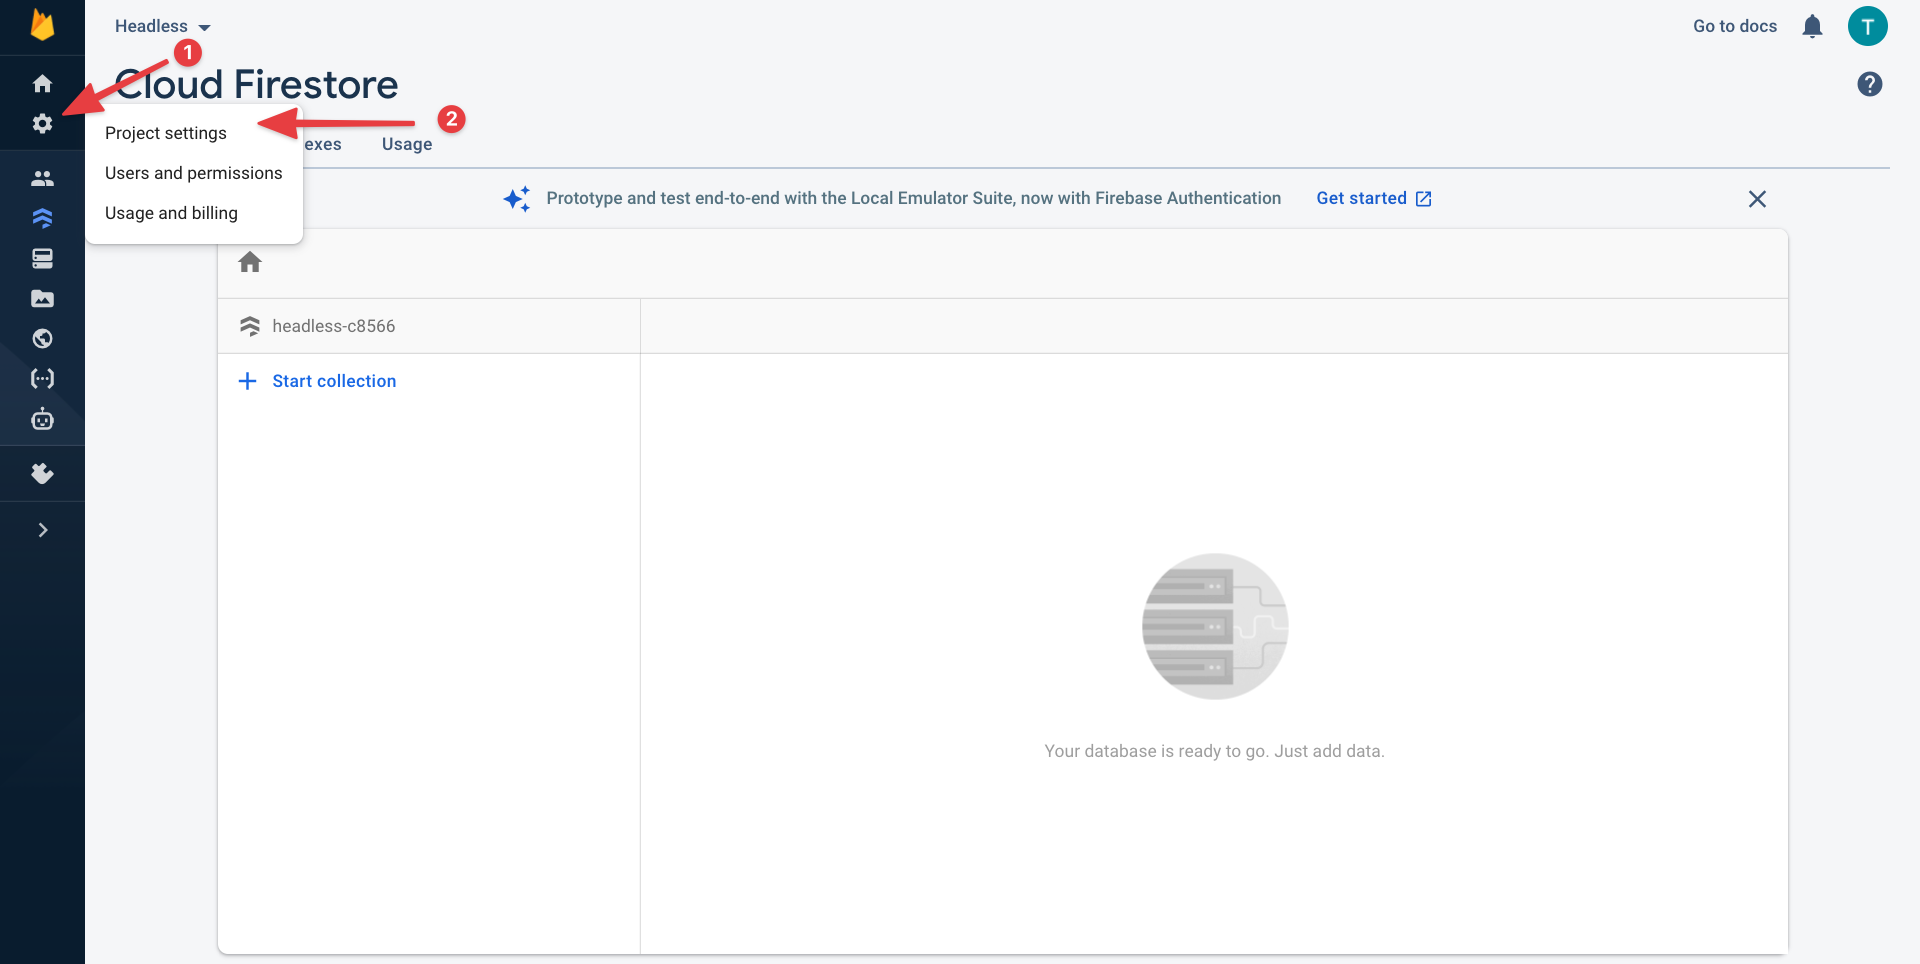
- From that project settings page, you'll find all the firebase credentials.
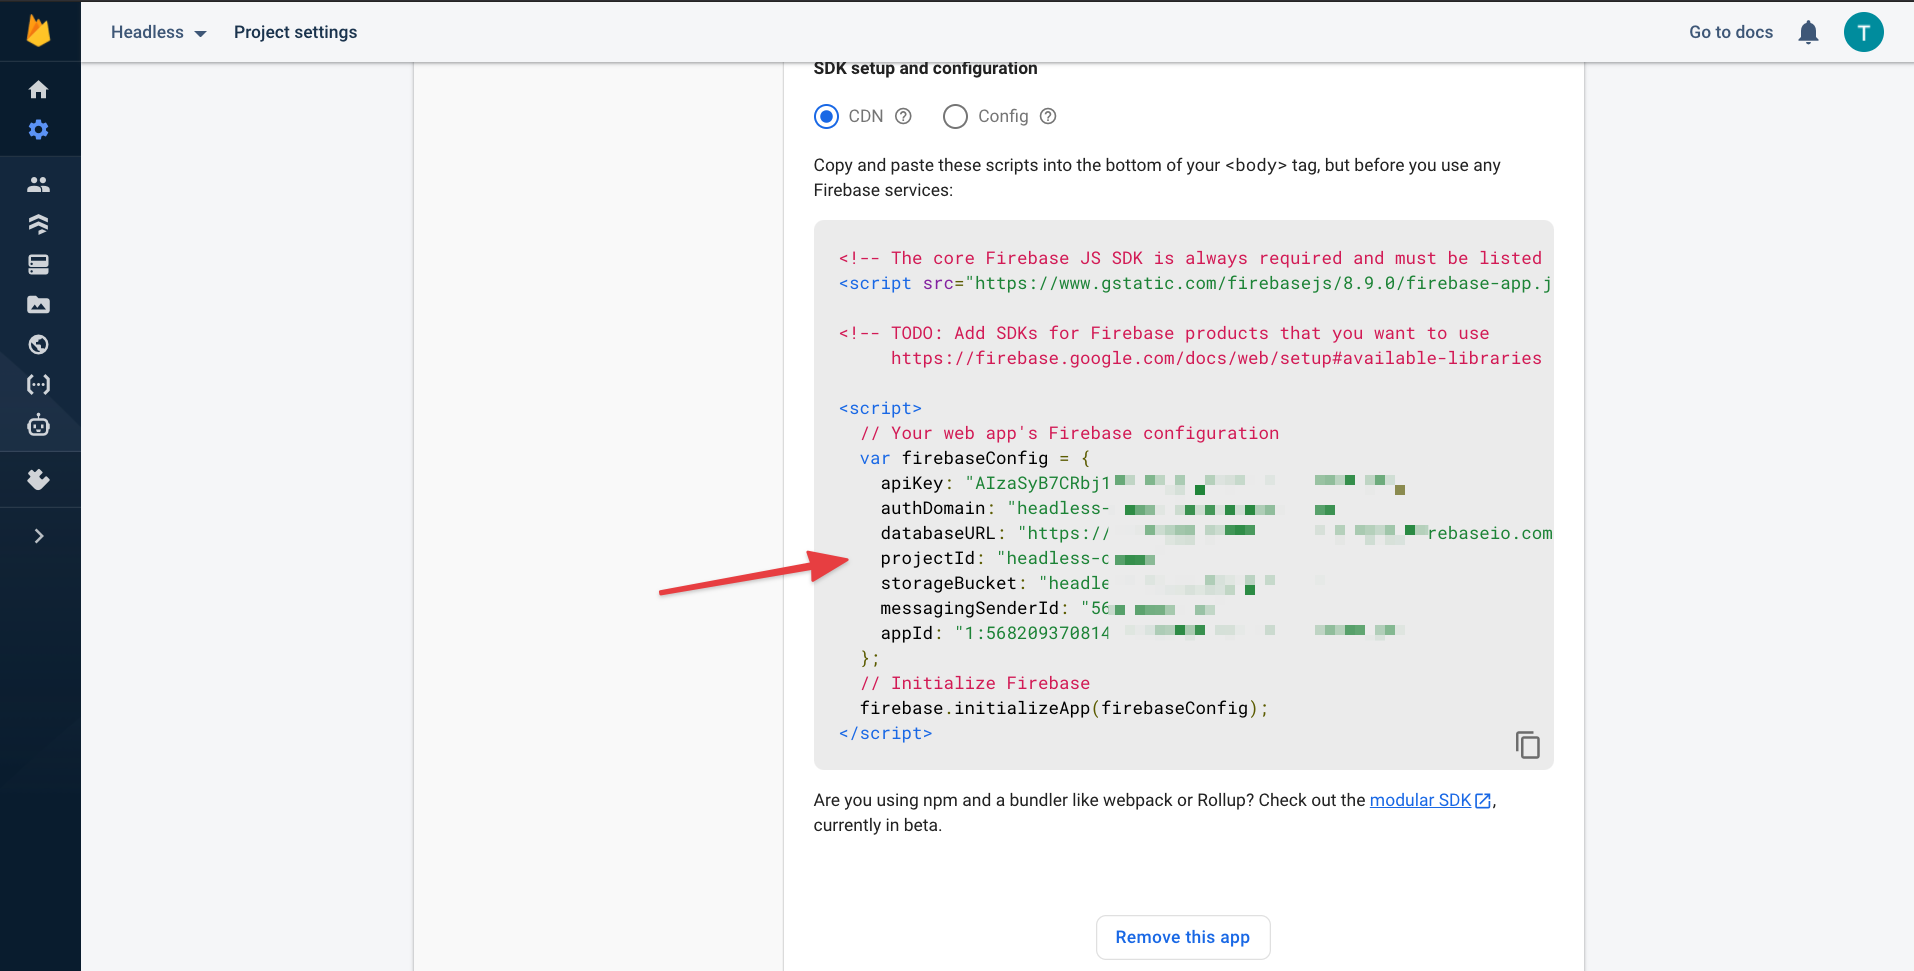
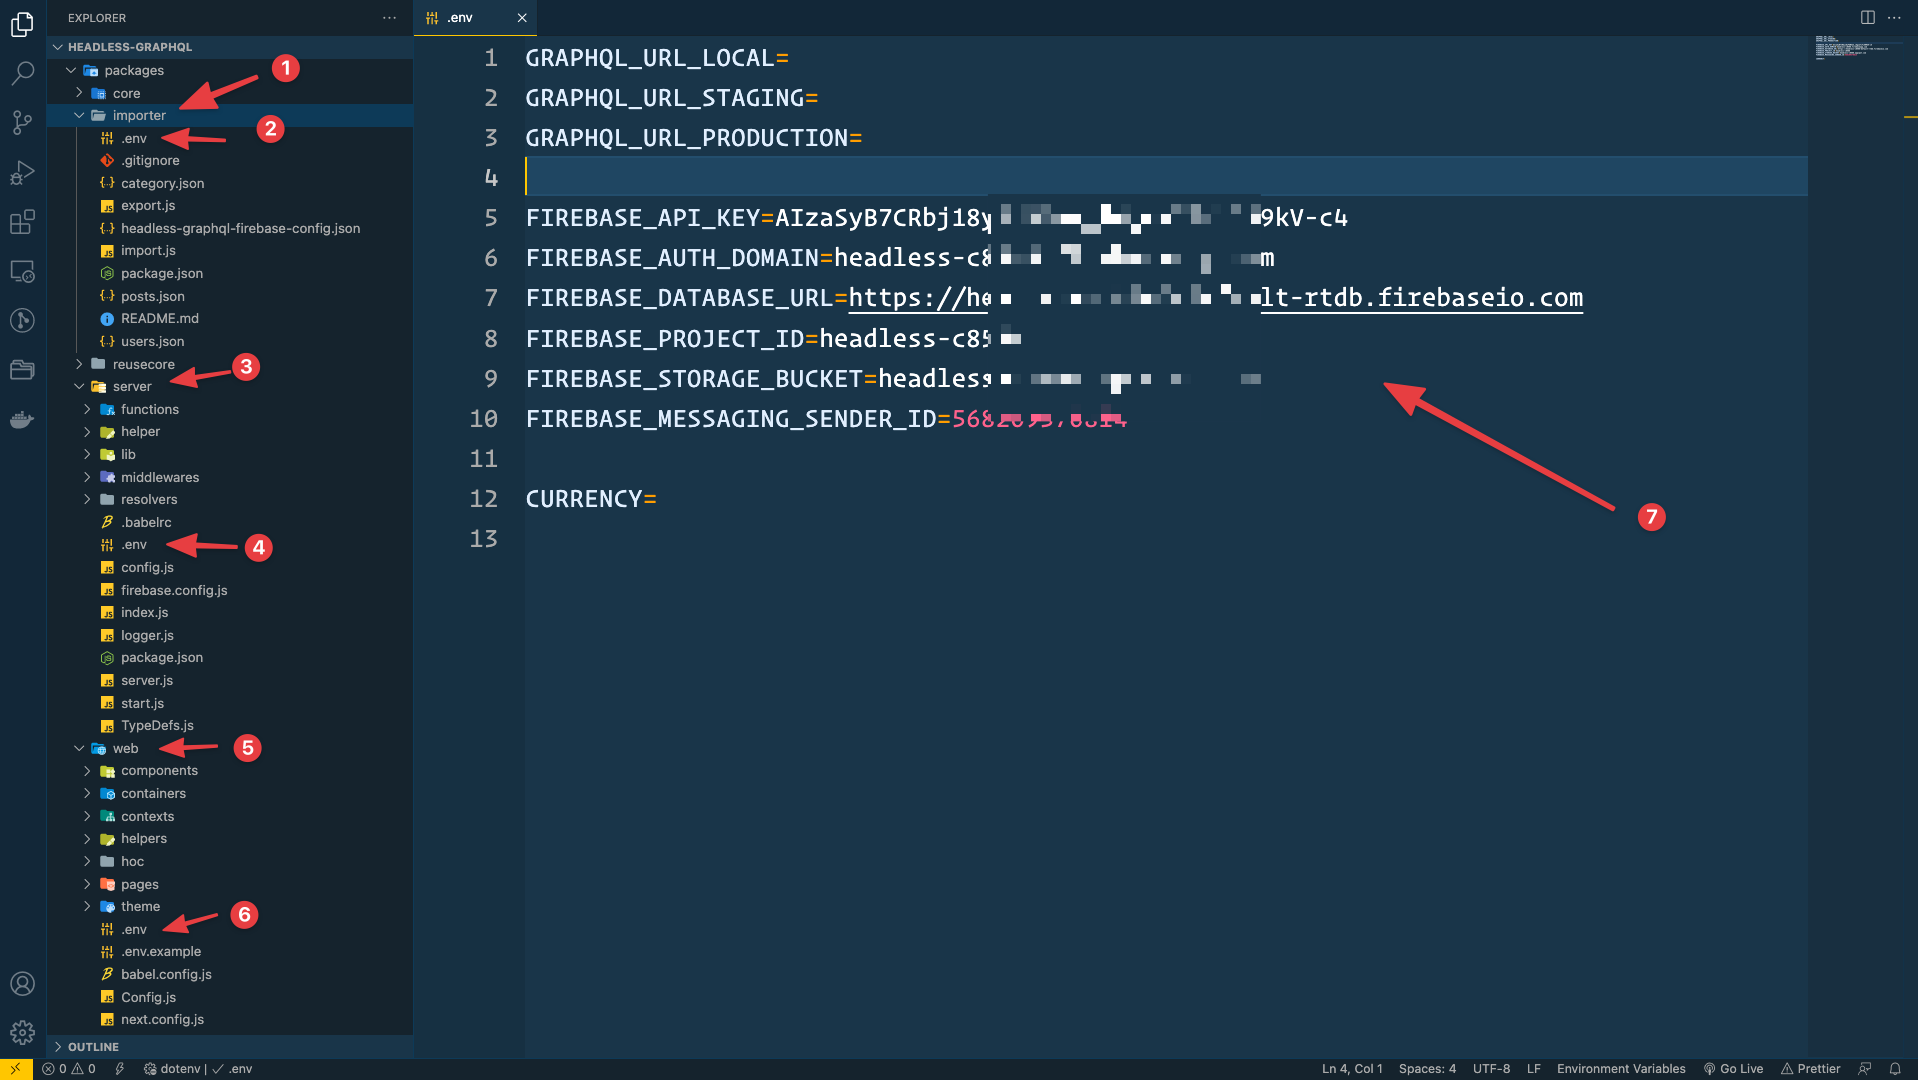
Now to add this firebase credentials, rename .env.example to .env from,
packages/web/
packages/server/
packages/importer/
And the add firebase config credentials to that .env
Google Map
Follow this link and create a Google Maps API key.
https://developers.google.com/maps/documentation/javascript/get-api-key
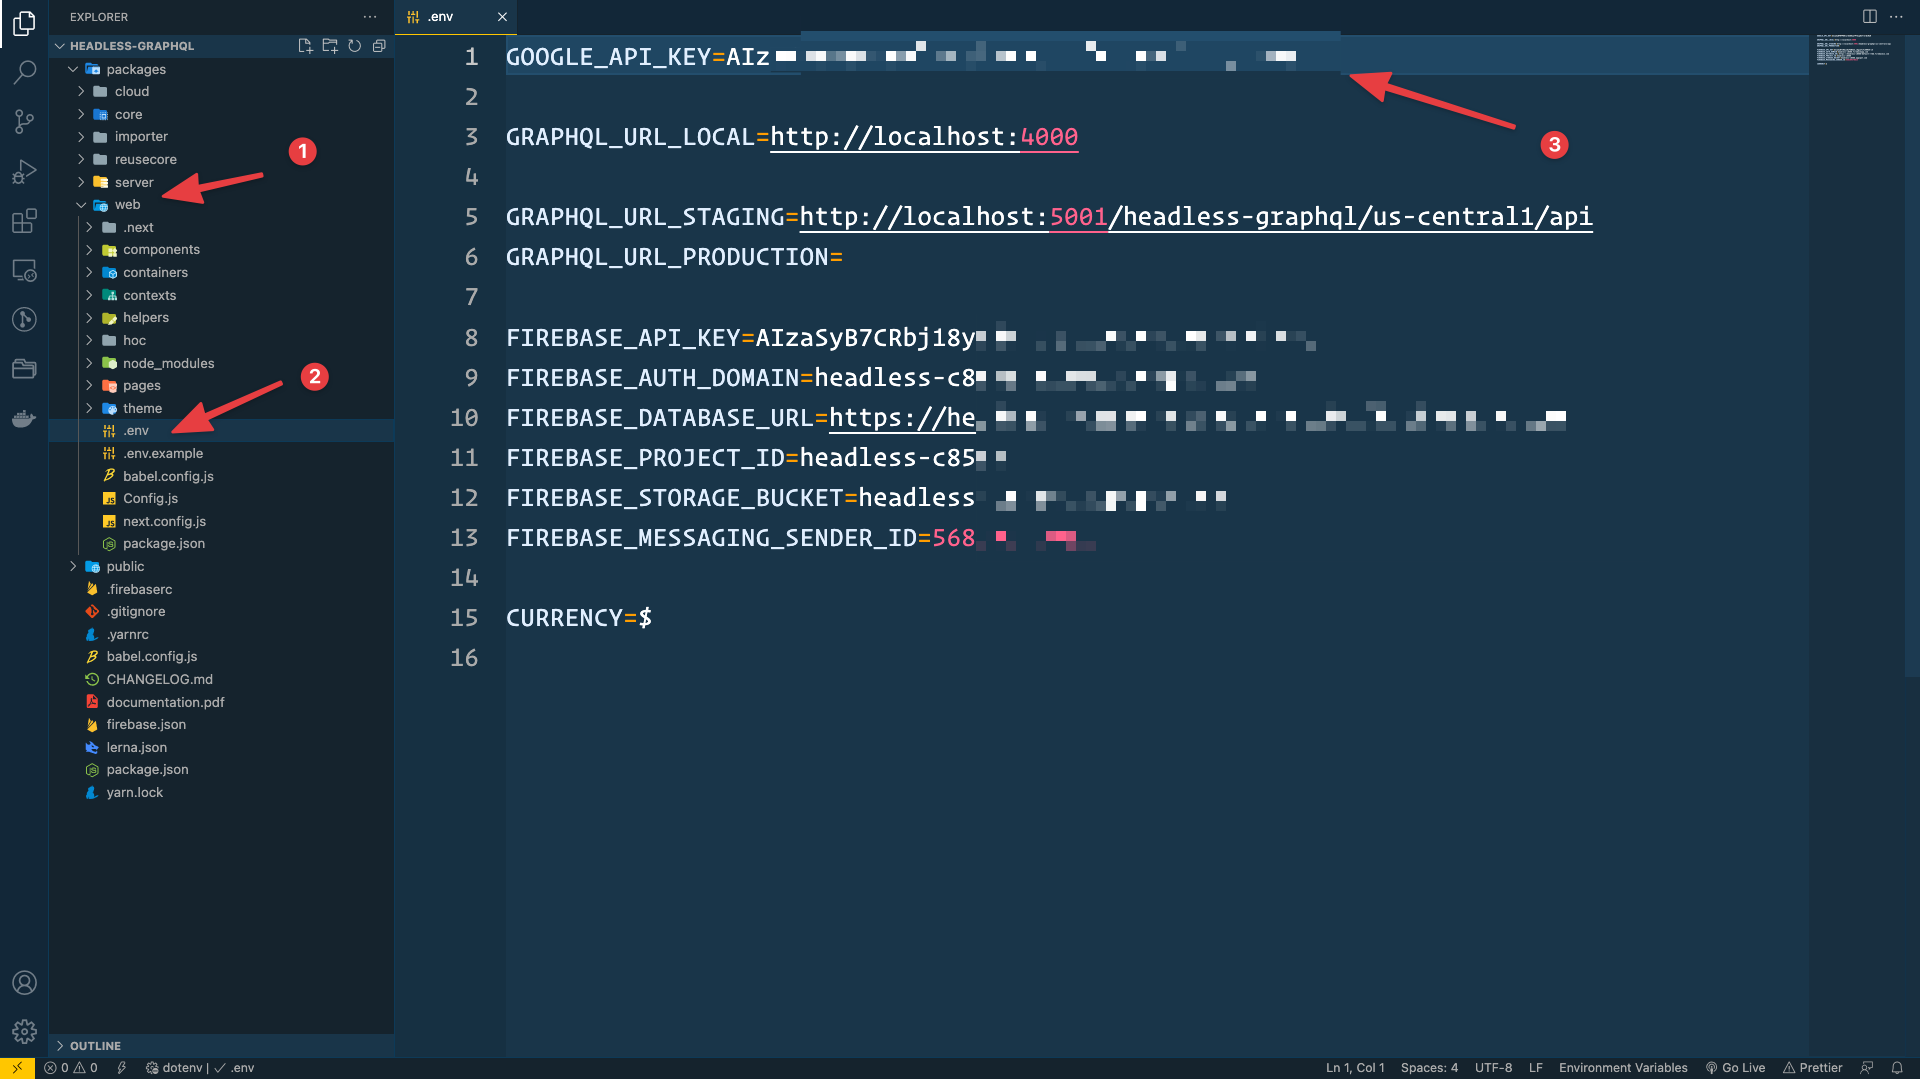
After creating the API key, add the Key to your,
packages/server/.env
and,
packages/web/.env
Firebase Admin Config
Go to your project settings from firebase console again,
And then Create A New Service and Generate a new private key.
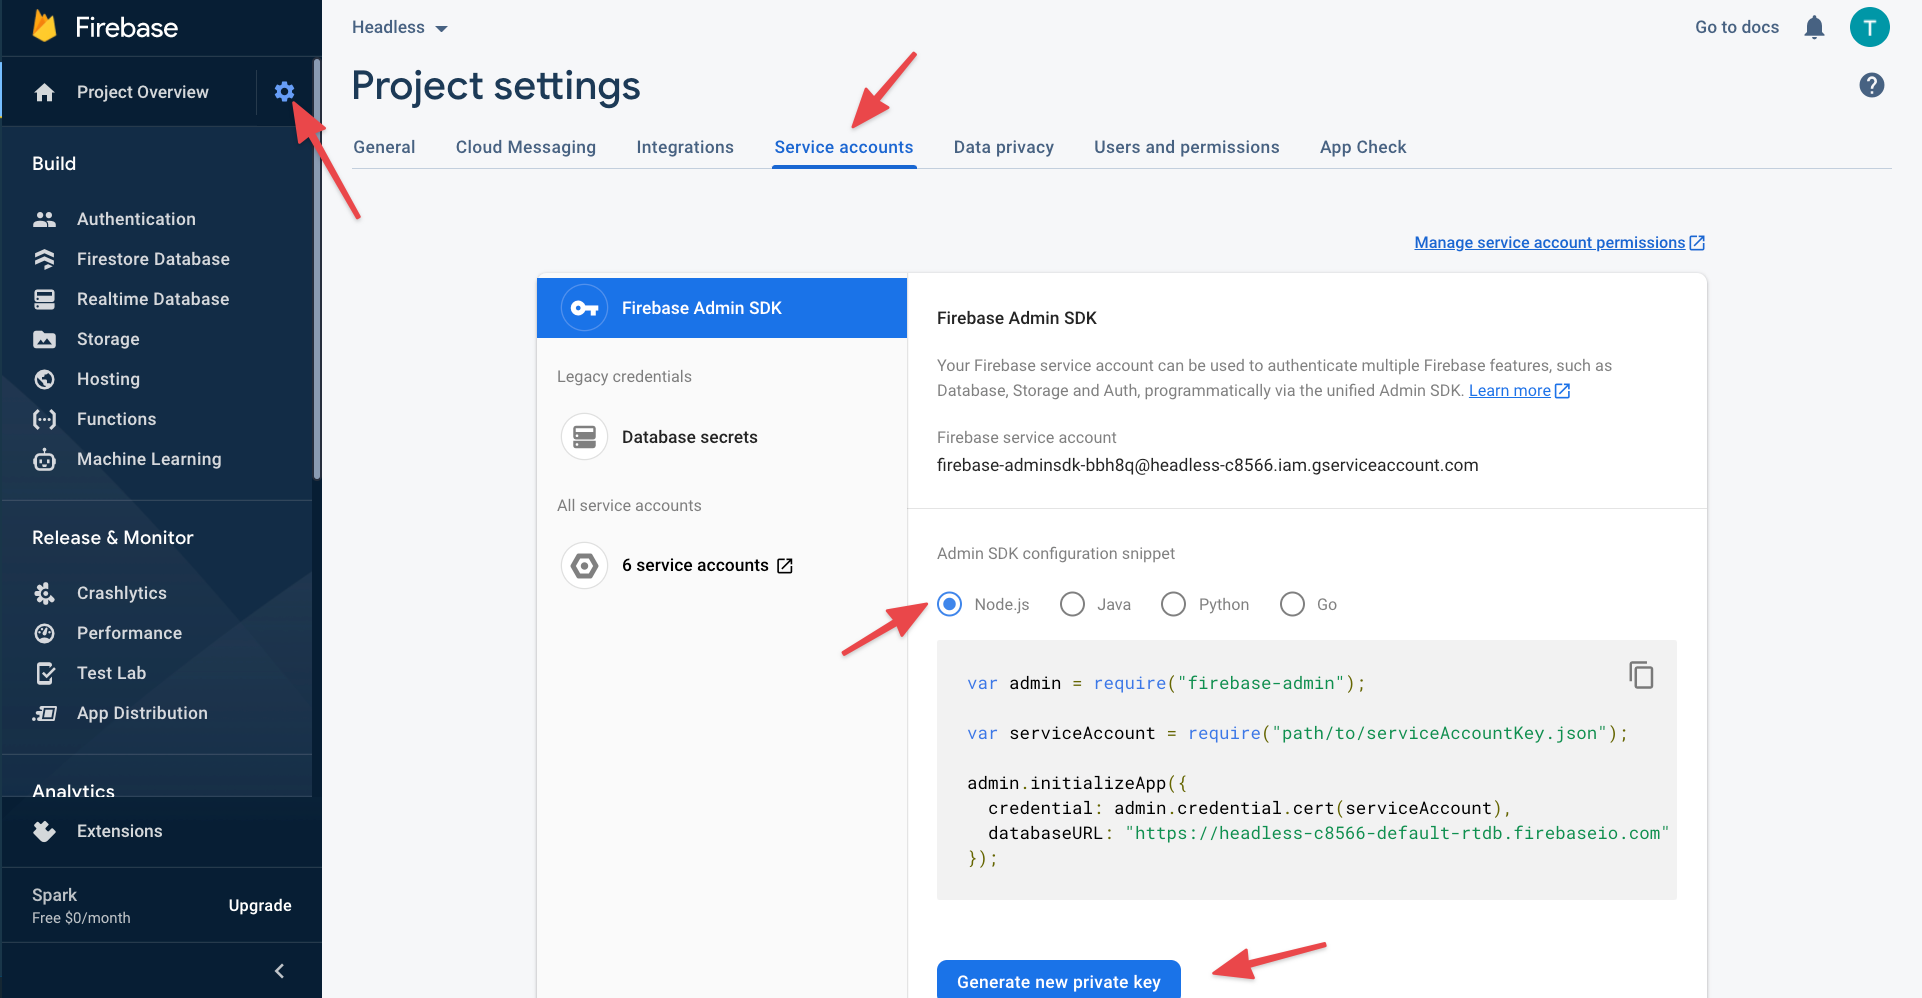
With that, a JSON will be download.
Open that JSON to your Code editor and,
copy one by one credentials to your
packages -> server -> config.js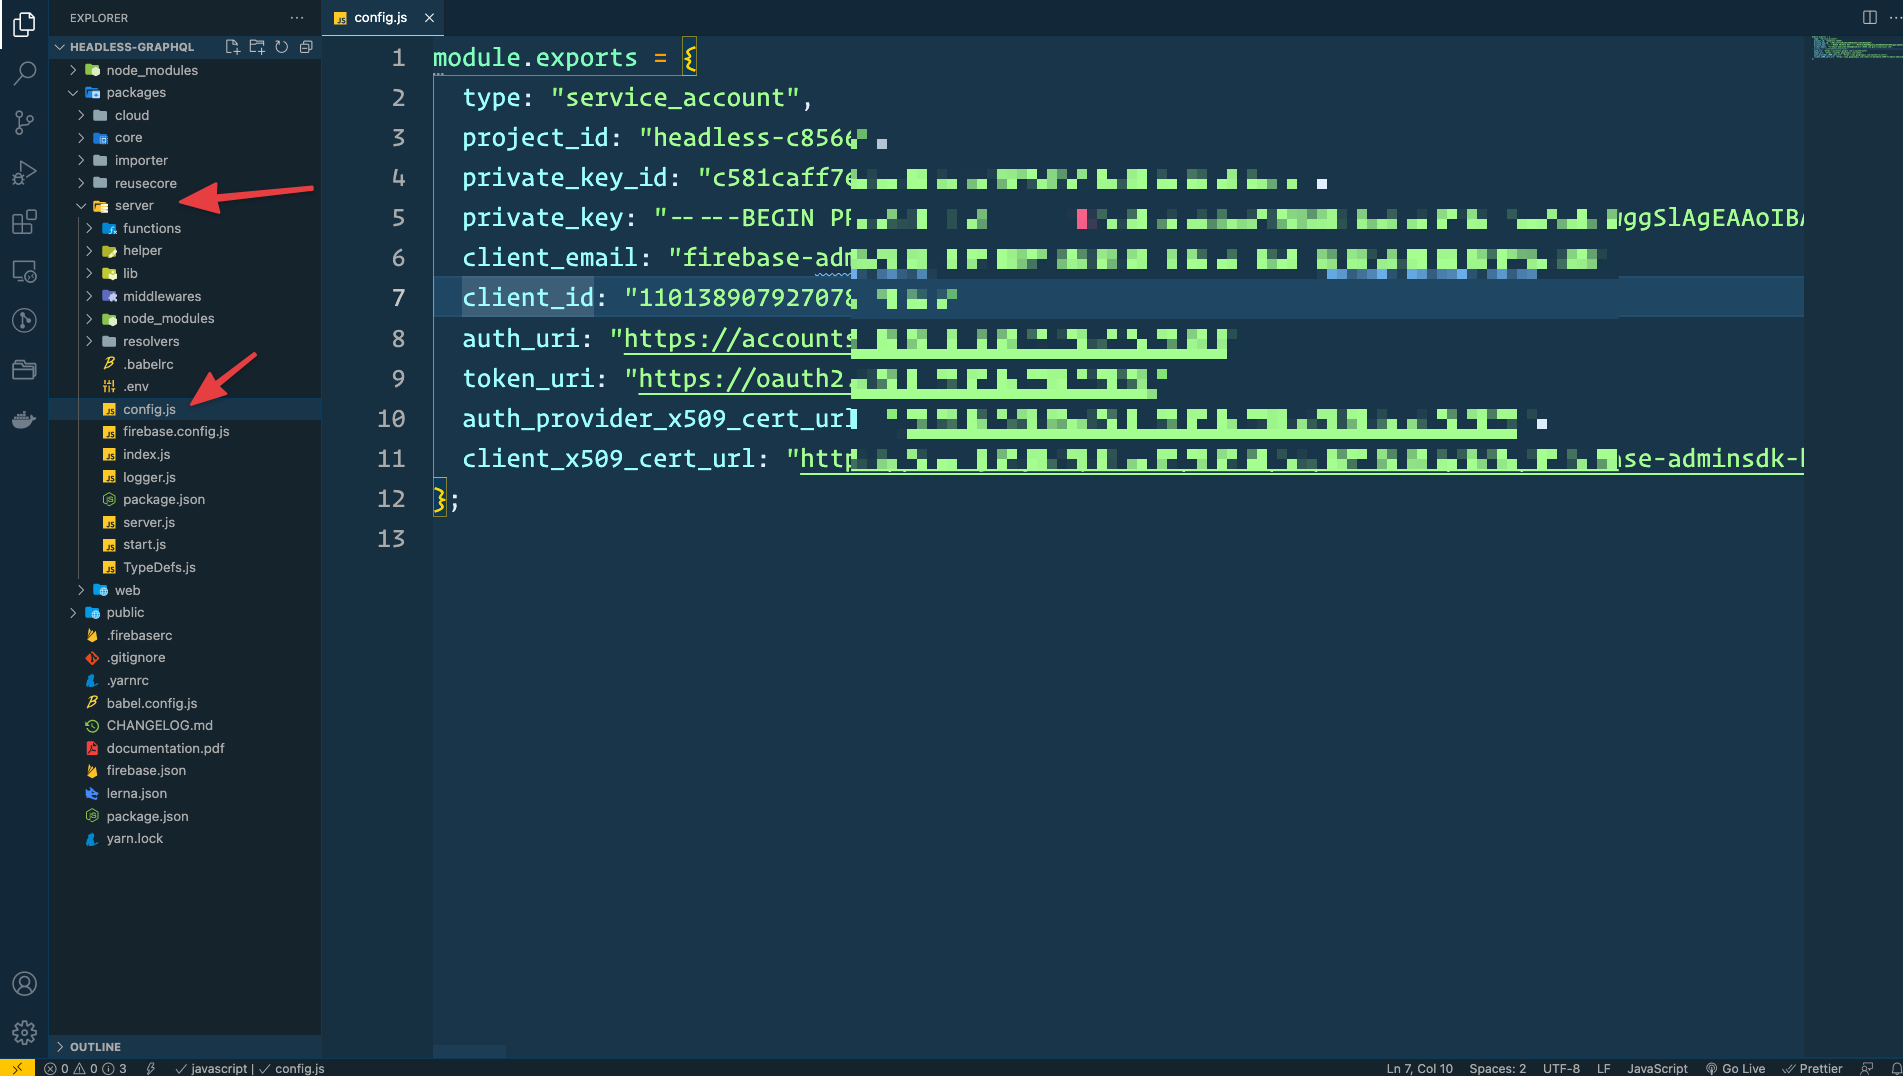
And copy full
jsonto yourpackages -> importer -> headless-graphql-firebase-config.json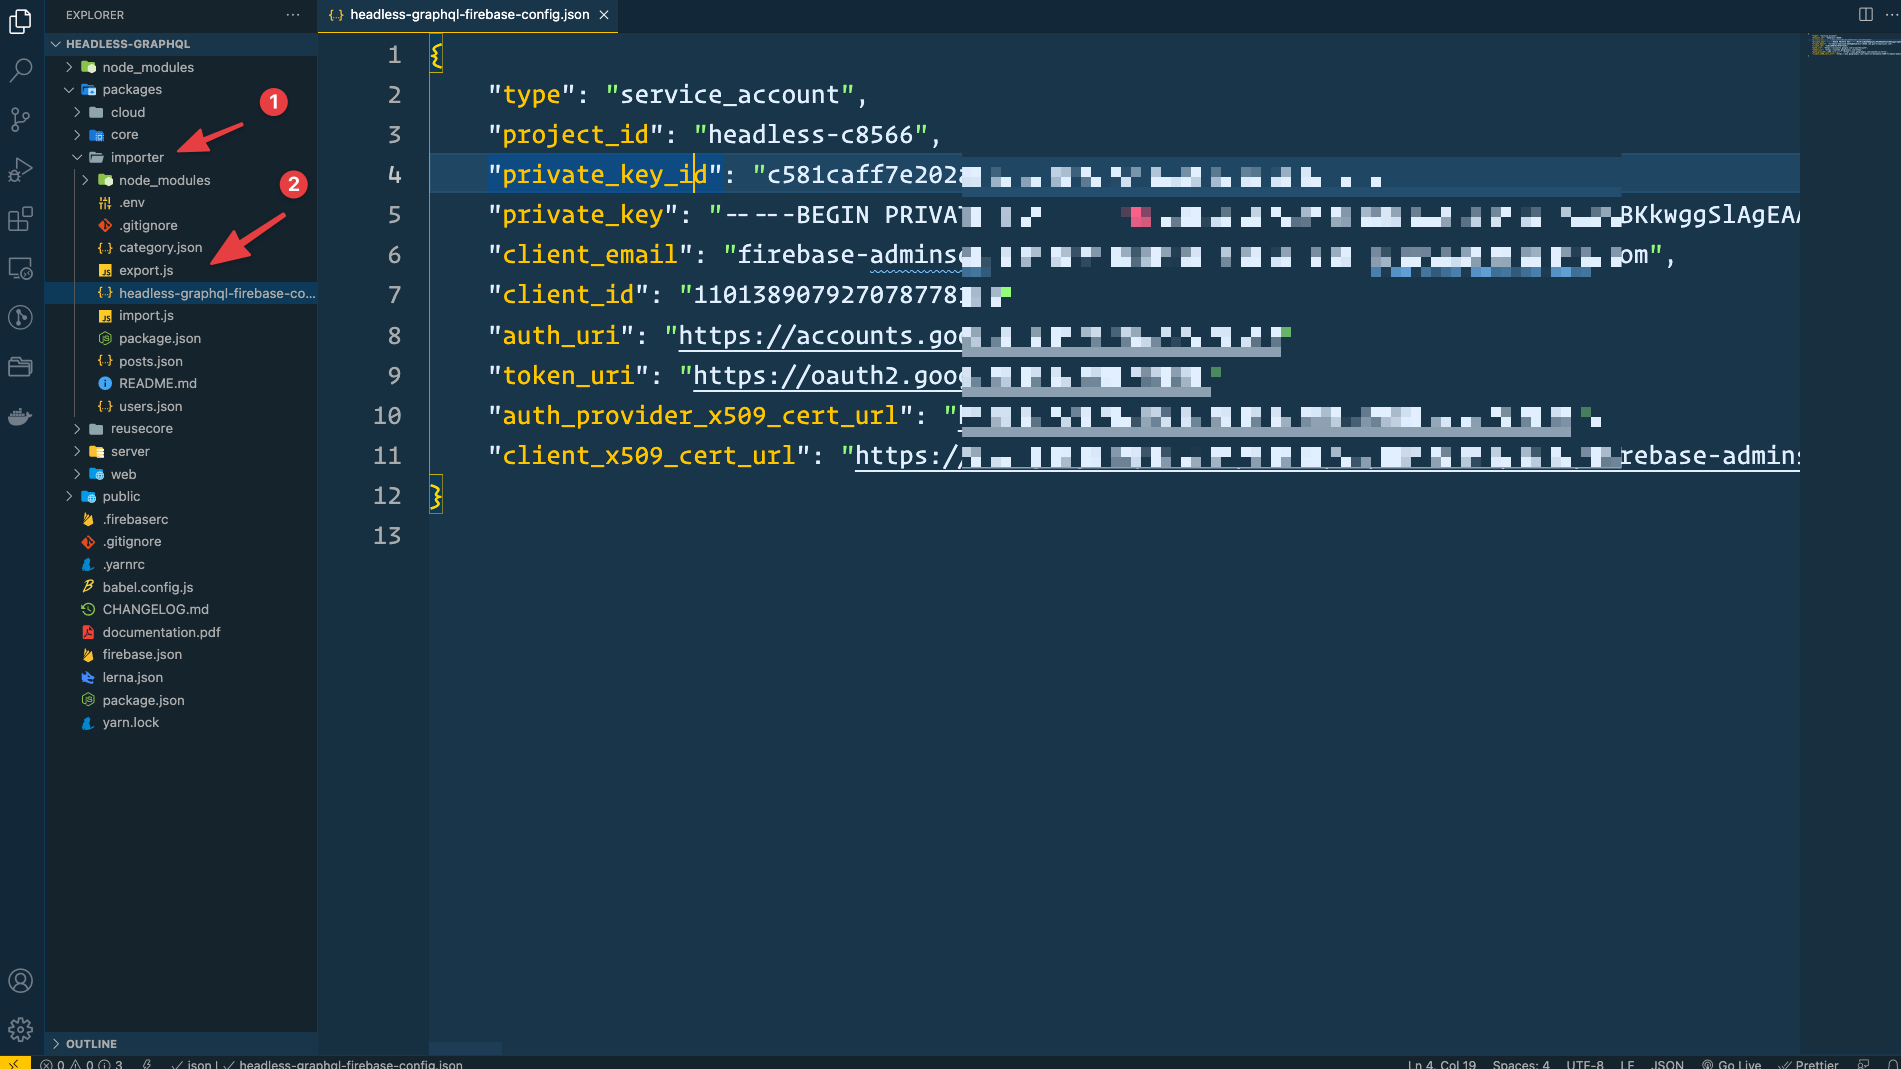
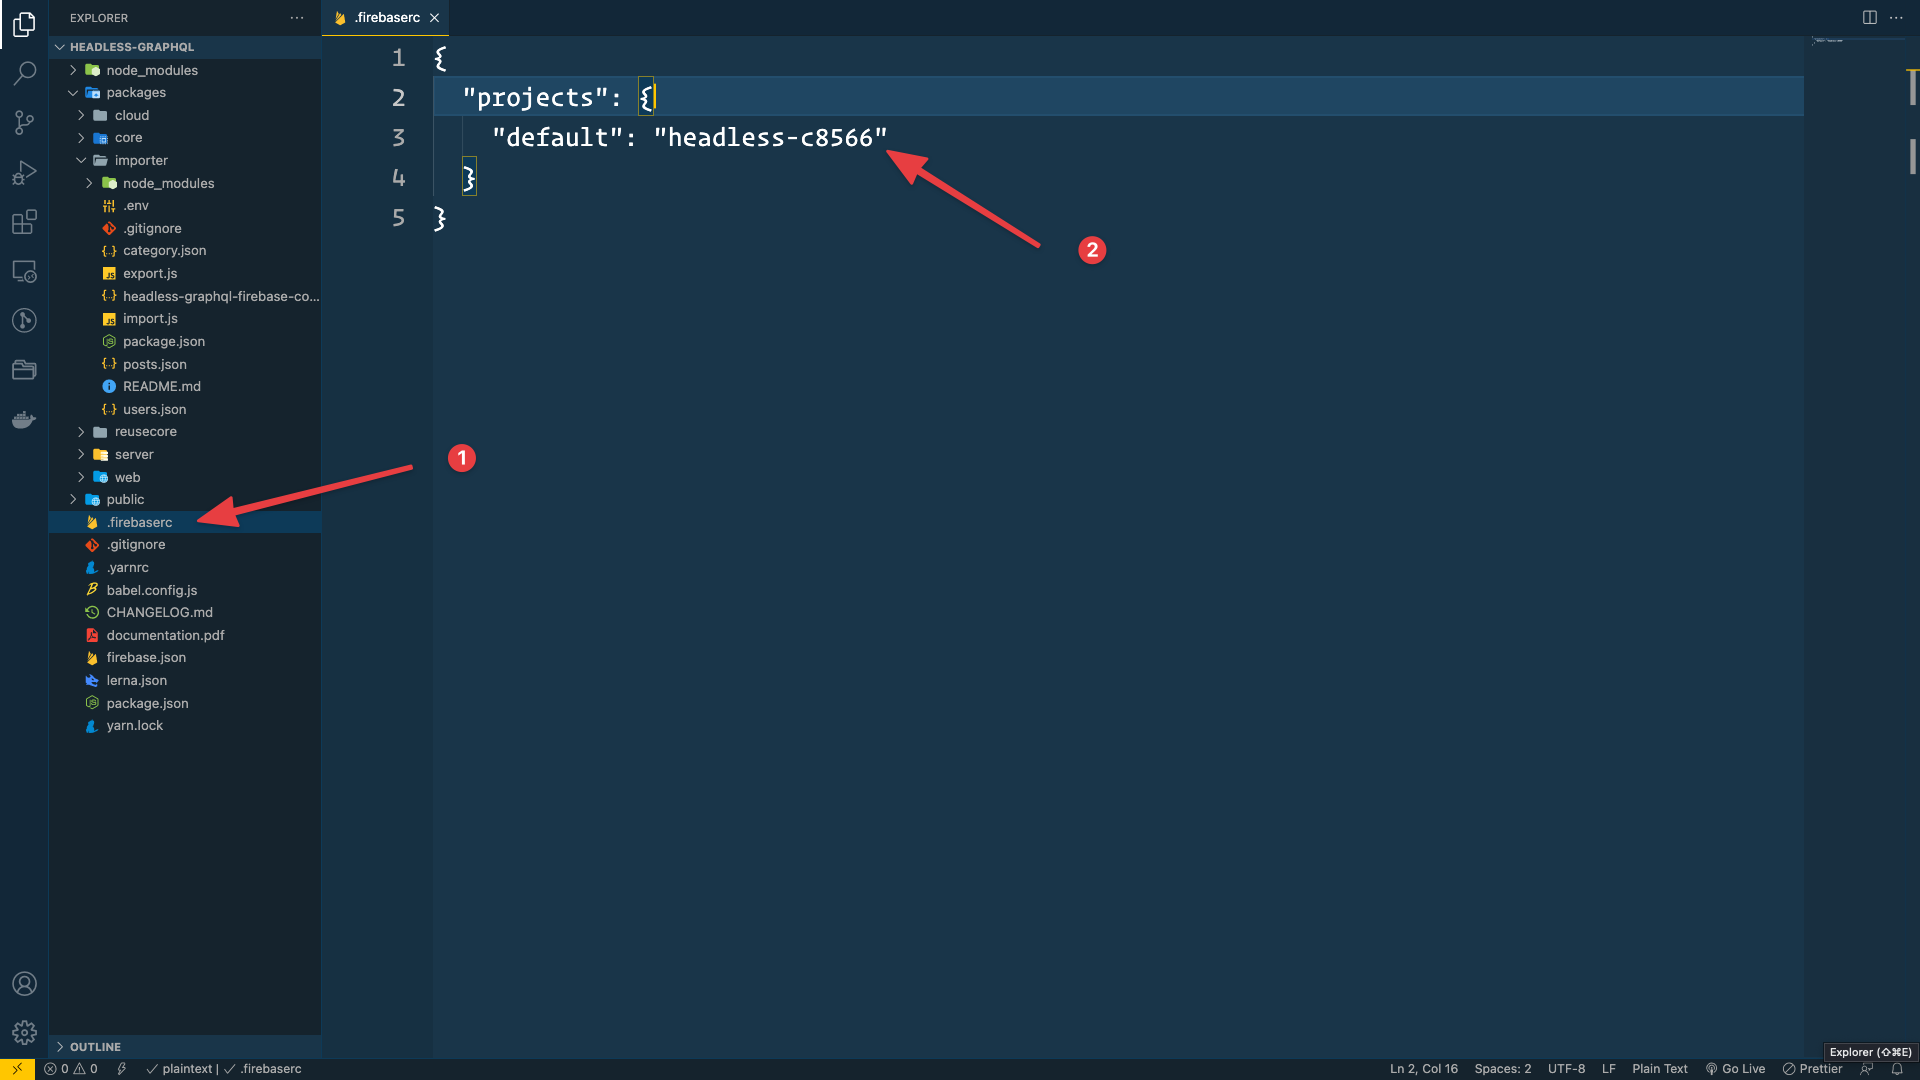
Then open .firebaserc and add your firebase project id
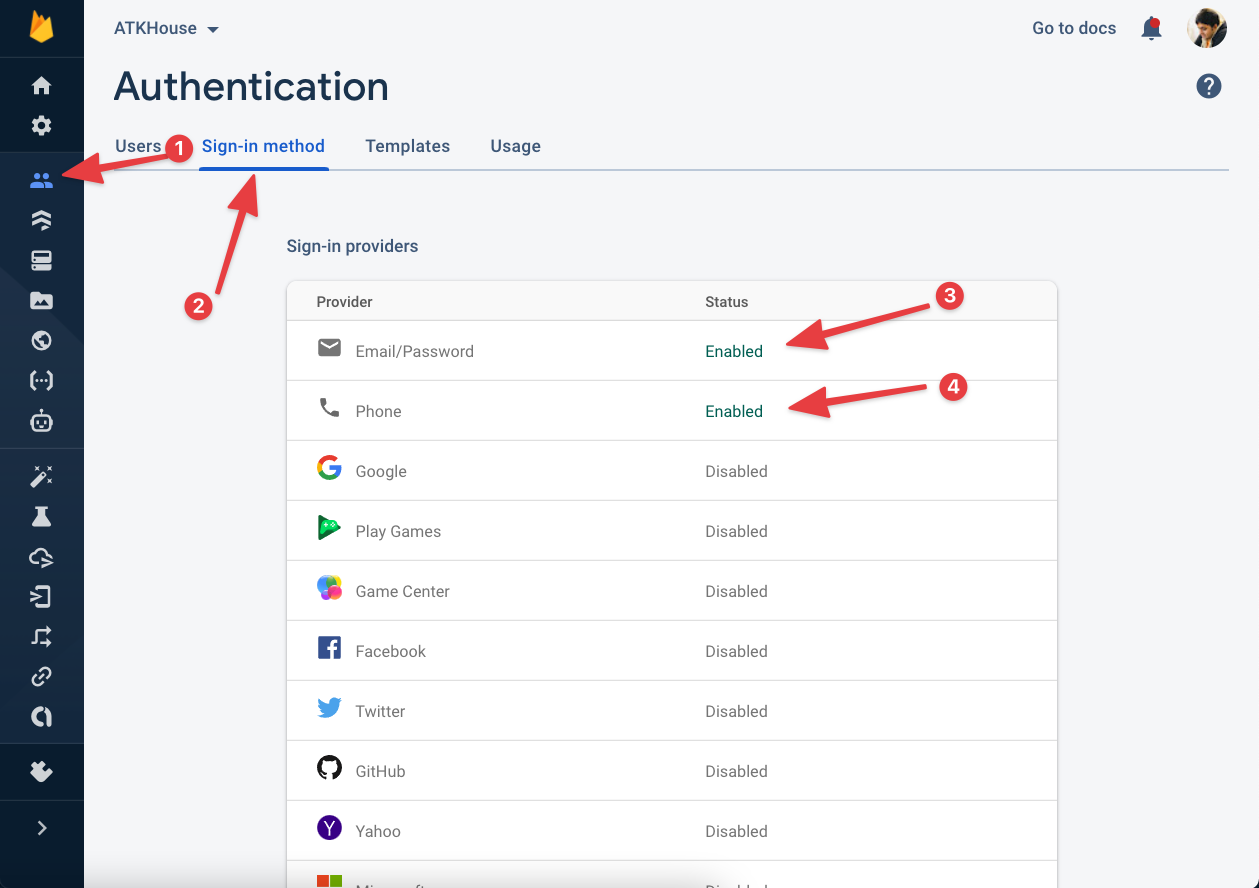
Authentication
For authentication, you've to enable authentication from firebase console.
Other Config
Now, edit packages -> server -> .env and edit remaining config like this
GRAPHQL_URL_LOCAL=http://localhost:4000APP_FRONT_END_URL=http://localhost:3000CURRENCY=$
Then edit packages -> web -> .env and edit remaining config like this,
GRAPHQL_URL_LOCAL=http://localhost:4000CURRENCY=$
Install npm packages
Use this command from the root folder to install all the node packages.
yarn
Import Demo Data
For import demo data open packages -> importer -> package.json and add firebase project id to sync script.
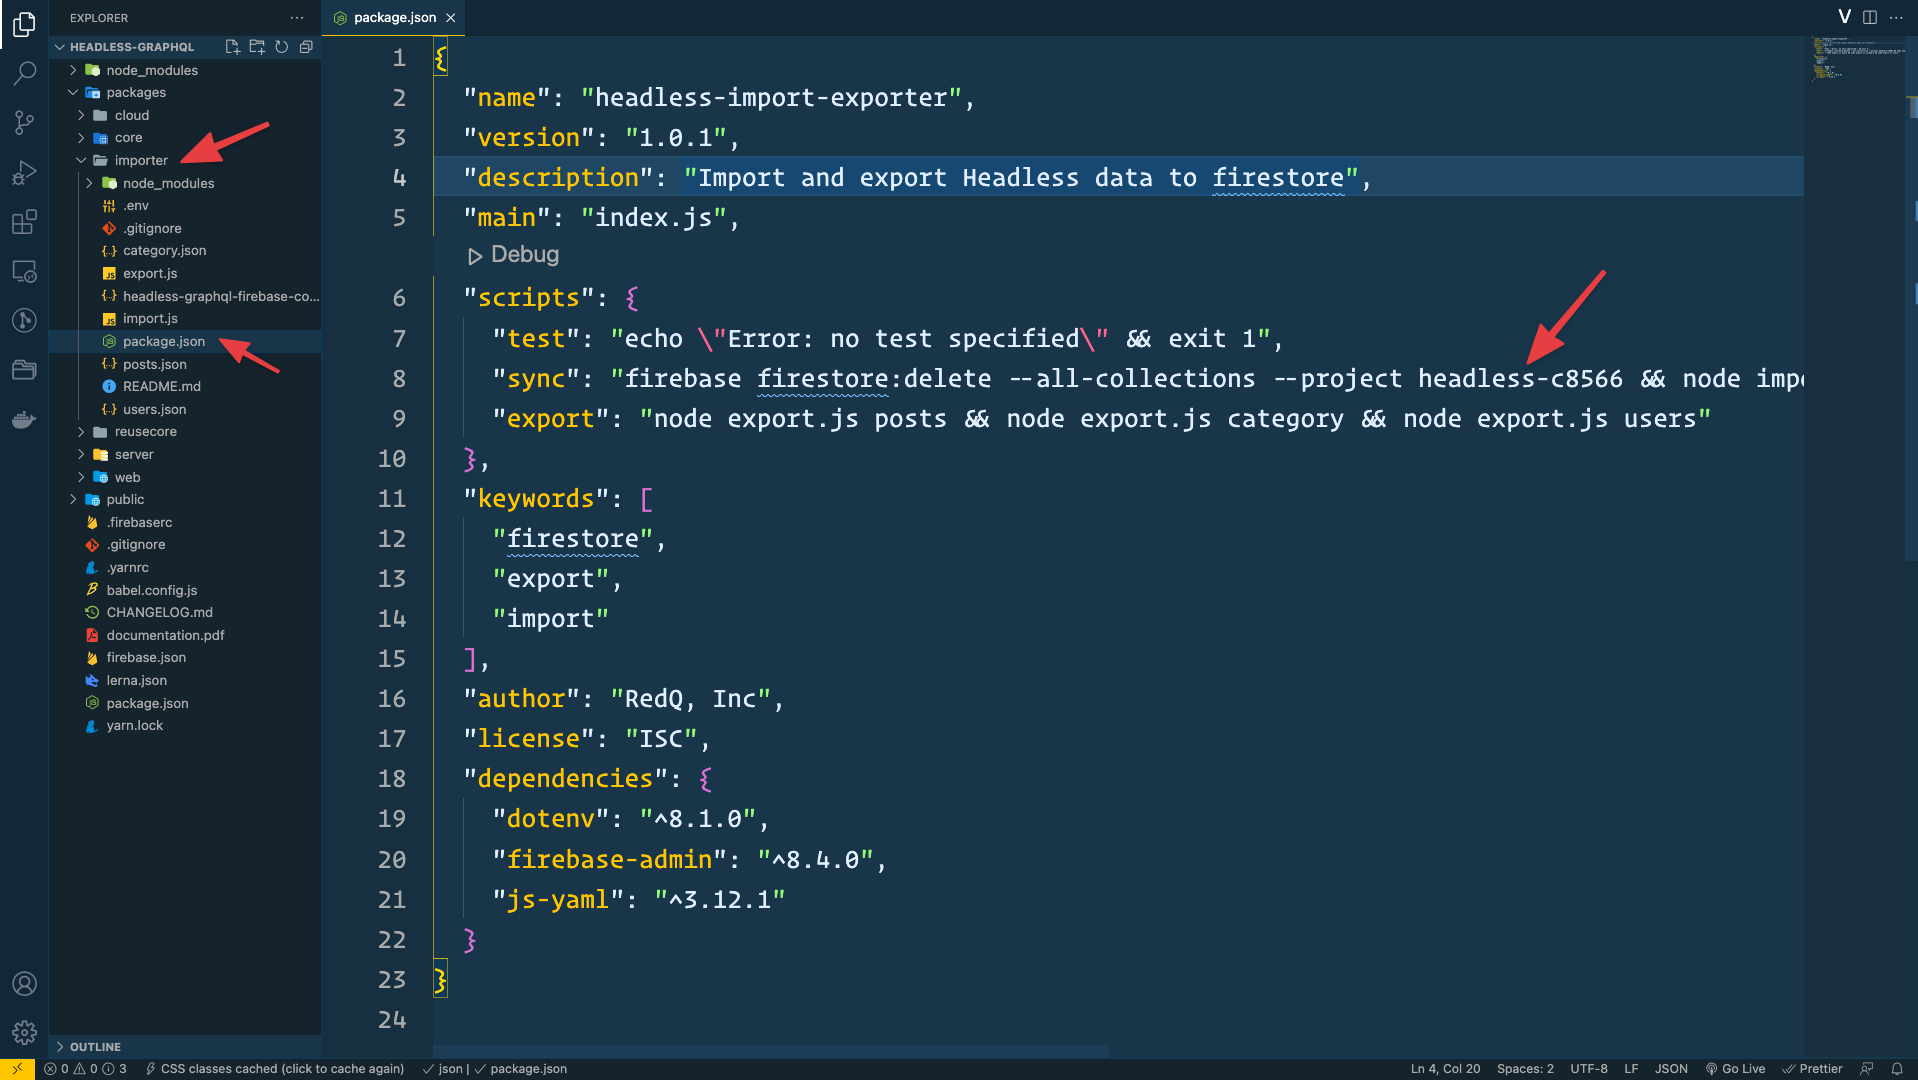
Then go to your packages -> importer from terminal and run,
yarn sync
Sometimes for network issues, the import command failed. So if you face any error during the import, try the
yarn synccommand a couple of times until you successfully import the data.
With that, it'll import demo data to your firebase firestore DB.
Run Project
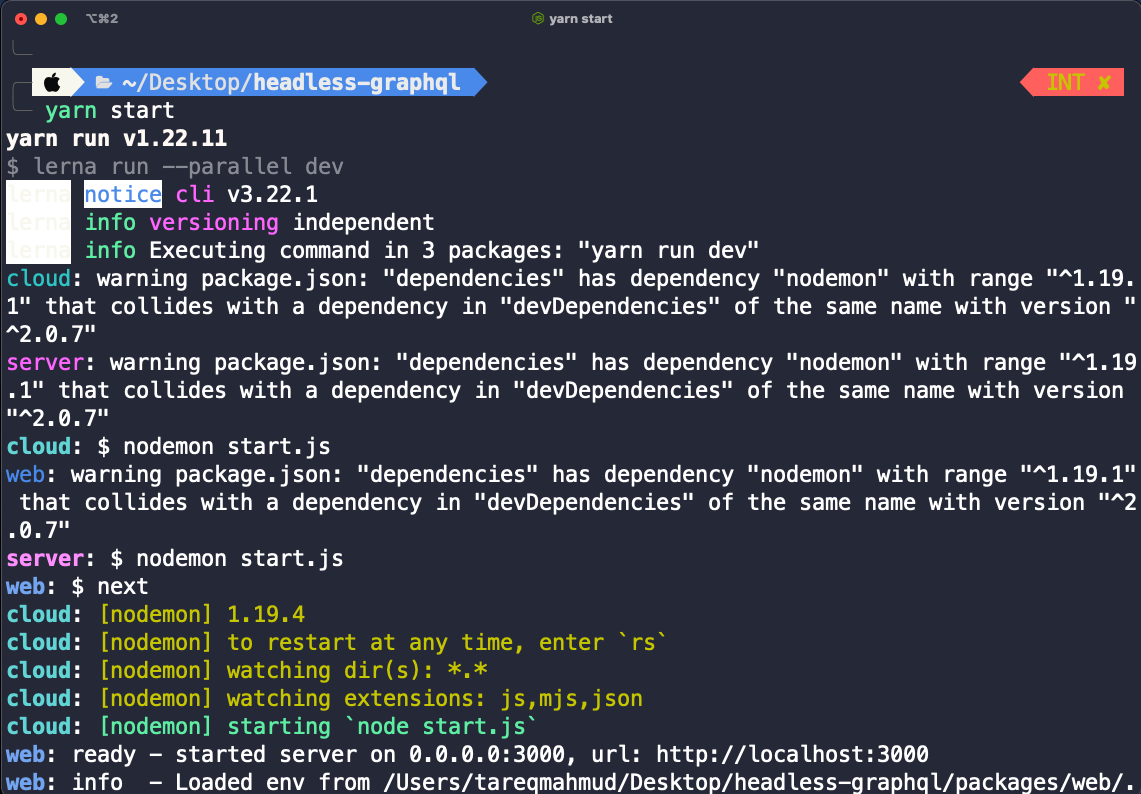
If you set all the config properly, then run this yarn command from the root folder,
yarn start
Then web server will run in localhost:3000, and graphql playground will run on localhost:4000/playground
Navigate to localhost:3000 in the browser to see the site.