Frontend Implementation
Headless Frontend Section [user view] basically build based on this procedure.
- Pages are built according to NextJS paradigm.
- Each pages are build on some Containers
- Each Container hold on some components
- Components render the data and perform their tasks 5. Datas are fetched via the GraphQL queries.
Now, Pages, Containers & Components related information you can grab via the project folder structure discussed before. Let's make a dive into the Data fetching using GraphQL queries and some very related tasks.
For data fetching we are using useQuery hook from @apollo/react-hooks
For example :
let's discuss here a query to fetch post data and display on the Home grid.
GraphQL Query :
import gql from 'graphql-tag';export const GET_ALL_POST = gql`query getAllPost($LIMIT: Int, $page: Int) {posts(limit: $LIMIT, page: $page) {data {idslugtitlepriceimage {urllargeUrl}}total}}`;
Then this query need to be called in the Container where you need to display & process the data.
Now, in the Home container import that query and prepared the data.
// pseudo code //import React from 'react';import { useQuery } from '@apollo/react-hooks';import { GET_ALL_POST } from '[FROM-THE-JS-FILE-THE-QUERY-IS-WRITTEN]';const Home = () => {// QUERY SECTIONlet QUERY_VARIABLES = {LIMIT: 8,};const { data, loading, error } = useQuery(GET_ALL_POST, {variables: QUERY_VARIABLES,});// Extract Post Dataconst postData = data.posts ? data.posts.data : [];return (<React.Fragment><YOUR_HOME_CONTAINER /></React.Fragment>); }export default Home
Auth
This Application uses Cookie to store the token, As a complete server side rendering app you need to use cookie. as cookie can be accessible from both server and the client. Now, I will discuss how Authentication works in this application and it's flow.
Basic Login Step:
- First, Go to the Signin or Signup page
- provide your email, password or mobile number
- click on the signin or signup button
- if your credentials are ok,then firebase will return a token 5. then we have saved this token in to the cookie
- and redirect to the homepage as a logged in user
so, we have seen in the above step that how we are getting the token from the firebase and using it as our initial login. to check the code first you need to go to the below file,
packages/web/containers/SignInForm or packages/web/containers/SignUpForm
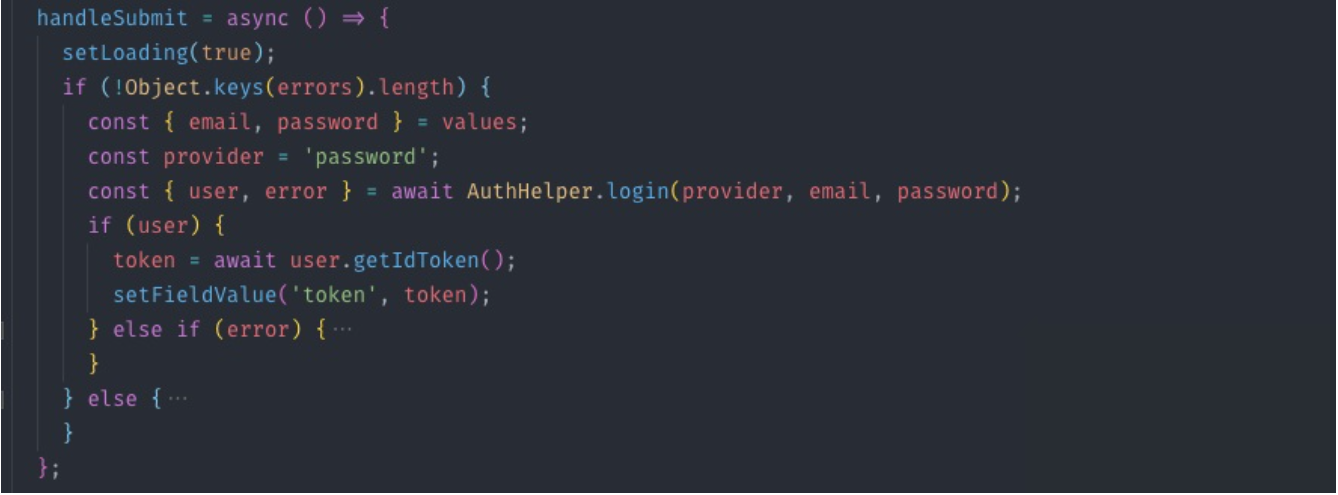
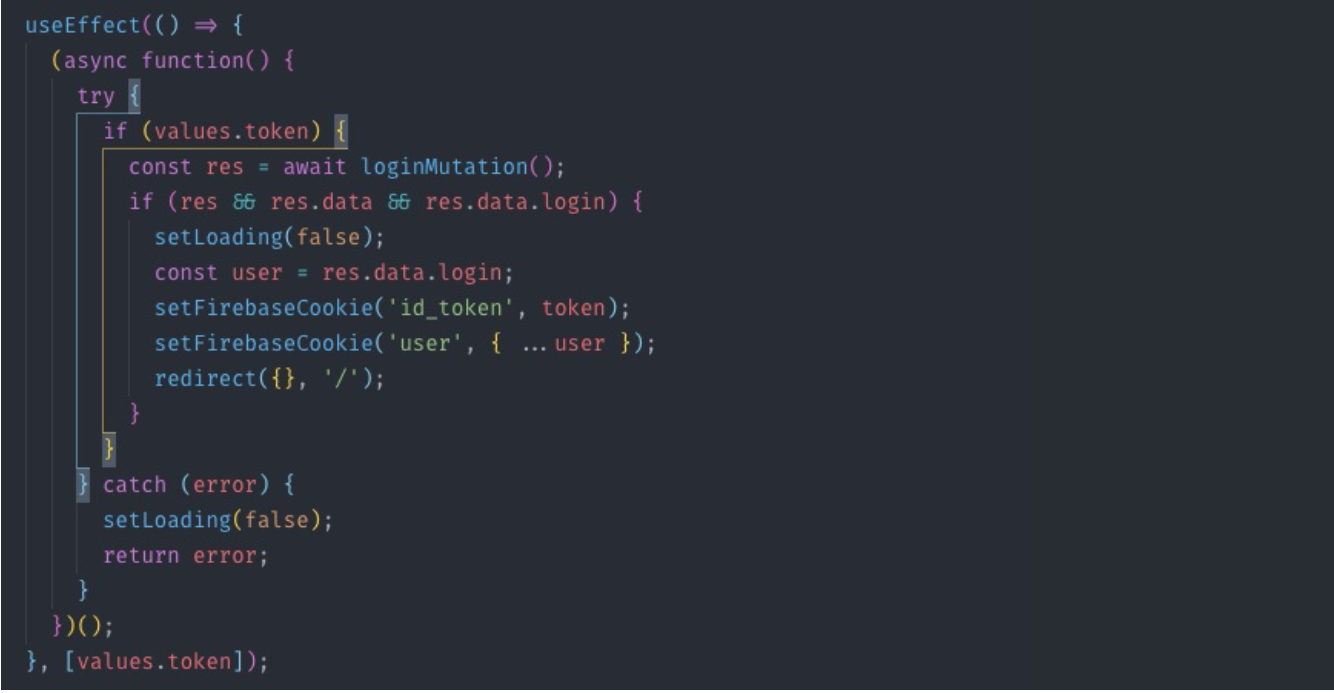
in the above file we have used Formik to handle form data and then used our AuthHelper to send this data to firebase. Look at the handleSubmit function, after doing the request firebase will return the user which have use to get the token. Then we have set the token using setFieldValue which will revoke the useEffect hook and set our token using the setFirebaseCookie function.
so, now you have your token in your cookie and you are in the home page as a logged in user. but wait, theres more to it. what we have just done is just frontend authentication. but we need to check our protected page (profile, add post) and validate the user if they are the right user to access the page, also when adding new post or doing any changes in the account page we need to validate the user in the backend as well.
So, Now I will discuss this two section, How we have handled our protected page and how we have validate a user in the backend/admin section.
Protected/Restricted/Secret Page:
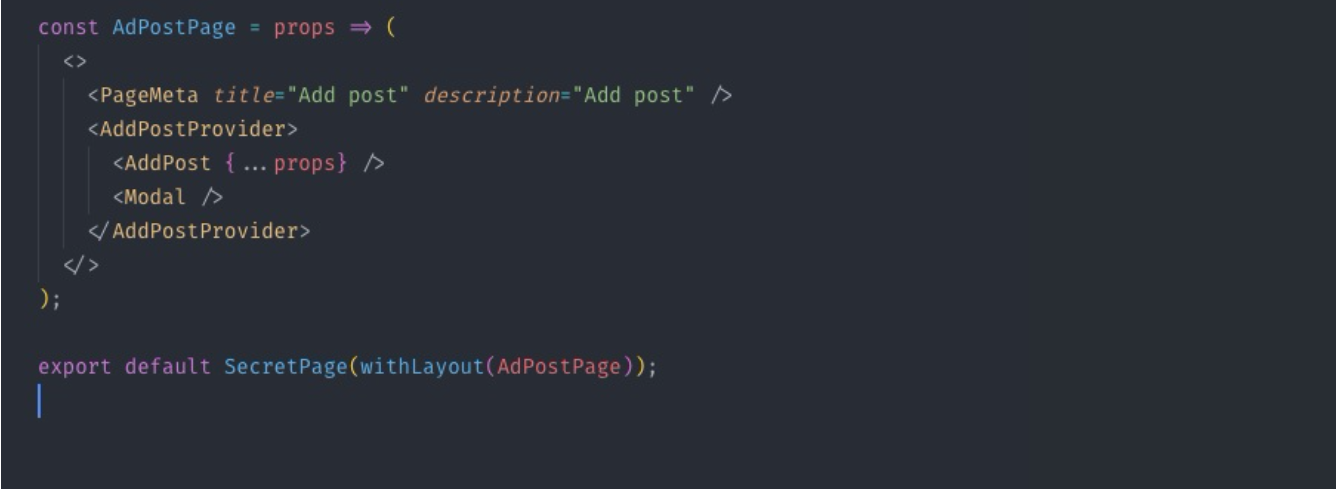
If a visitor comes to your site and not logged in yet, you will not want them to access any Profile, Account Settings, Add Post page as this page should only be available to your site users or members. The page is available in the menu (except the profile/account settings page) but when a visitor try to go to this page they will be redirected to the login page. We have create a HOC you will find it in the packages/web/hoc/secretPage.js here we have checked if the token available in our cookie using the context of getInitializeProps. if true then the user is logged in other wise the user can't access the protected page.

This hoc secretPage is applied to the packages/web/pages/add-post.js
Backend/Admin Validation Check:
Once we have set our token into the Cookie, the server will always get access to this token using our apollo configuration.
we have followed the below docs from Apollo,
https://www.apollographql.com/docs/apollo-server/features/authentication
https://www.apollographql.com/docs/react/recipes/authentication
and here's how we have done it in the code,
first go to the packages/web/helpersdirectory look at the apollo.js file.
we have send the token to the apollo graphql server, now we need to validate this token in the backend, here how we have done it,
- first we have retrieve the token in the
packages/server/server.jsfile(fordeploymentwe have used the index.js)
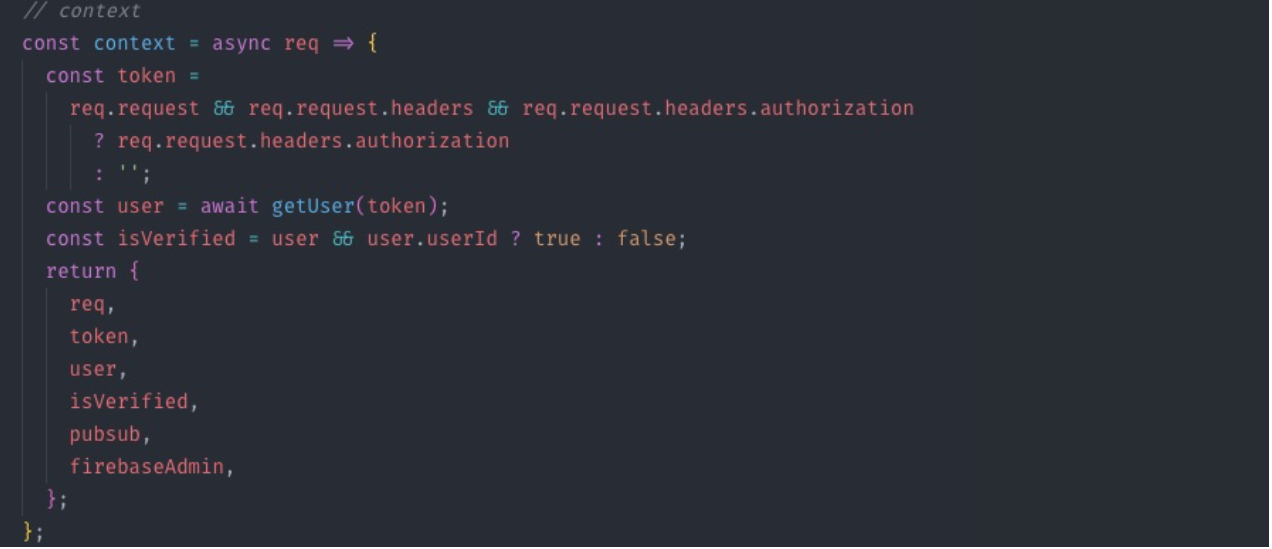
- thegetUserfunctionvalidatethistokenusingfirebaseadmintokenverifyIdToken function. To identify a user is owner, same user, admin of a post we have used Graphql Schield (https://github.com/maticzav/graphql-shield) as middleware.
That's it, This is the whole Authentication flow of this application.